软件环境
Nginx
用于反向代理,本地使用可跳过;使用官方源安装吧,Ubuntu 24.04里是1.24,而官方是1.30。
Git
普通用户可跳过,使用PPA源安装吧,Ubuntu 是23年的2.43版本,而ppa里是2.53。
- 如果提示无 add-apt-repository 命令,需要先
sudo apt install software-properties-common。另外,PPA 的源,在国内下载速度,都很慢。
sudo add-apt-repository ppa:git-core/ppa
sudo apt update
sudo apt install git
which git && git -v
Python
# 在Ubuntu server 24.04中,默认安装的是3.12.3;或可以从官网 python.org 下载二进包手工安装,新版本。
#sudo apt install python3 python3-pip python3-venv
apt list --installed | grep pythonpython3:Python 解释器python3-pip:Python 包管理器python3-venv:用于创建虚拟环境的工具,可以在用户级别管理多个版本,不会影响系统环境。类似Node.js的nvm、fnm版本切换工具。
$ python --version
Command 'python' not found, did you mean:
  command 'python3' from deb python3
  command 'python' from deb python-is-python3
ecs@vps260315:~$ python3 --version
在Linux下需要使用 python3 命令:
- 或者安装
sudo apt install python-is-python3,将python命令自动映射到python3。 - 或者在.bashrc中
alias python=/usr/bin/python3
# 改为国内源
pip config set global.index-url https://mirrors.aliyun.com/pypi/simple
pip config set install.trusted-host mirrors.aliyun.com
pip config get global.index-url
Node.js
从官方网站下载24.14 LTS Bin文件安装吧,约30M。
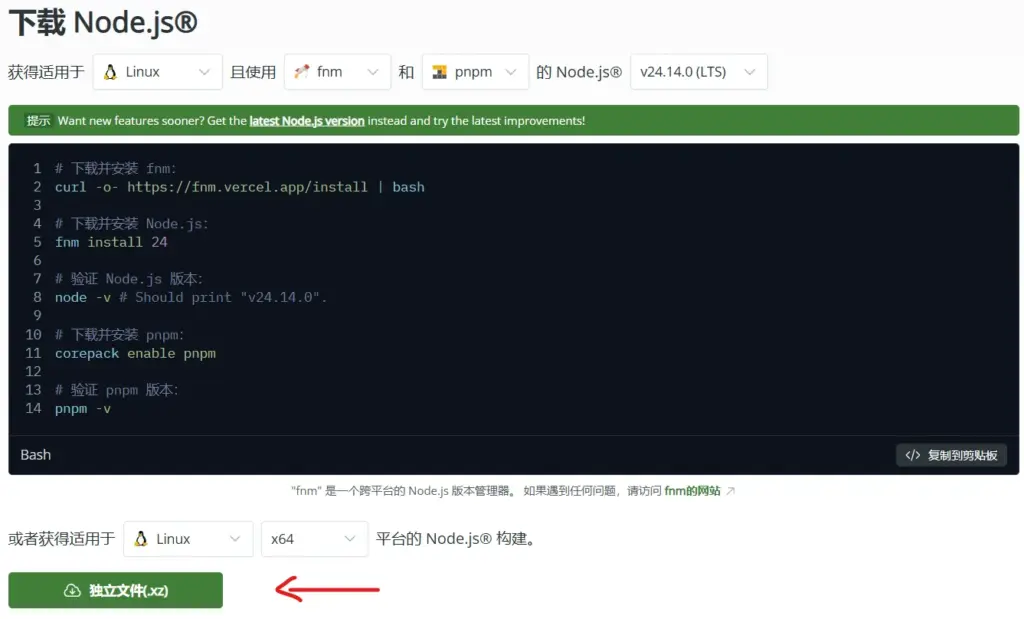
Bin文件安装
$ sudo tar -xf node-v24.14.0-linux-x64.tar.xz -C /usr/local/
# /usr/local/nodejs 目录的所有者是当前用户,不是root
$ sudo mv /usr/local/node-v24.14.0-linux-x64 /usr/local/nodejs
$ sudo chown -R root:root /usr/local/nodejs

$ sudo vim /etc/bash.bashrc
# 在最后增加一行 export PATH=/usr/local/nodejs/bin:$PATH
$ source /etc/bash.bashrc && source ~/.bashrc
$ which node && node -v && npm -v

$ npm config set registry https://registry.npmmirror.com
$ npm config get registry

# 一般不建议pnpm
npm install -g pnpm
pnpm -v
pnpm config set registry https://registry.npmmirror.com
pnpm self-update # 更新pnpm自身注意:安装到/usr/local/nodejs后:
- 用 pnpm 或 npm 安装的
-g全局包位置是/usr/local/nodejs/lib/node_modules/ - 会在
/usr/local/nodejs/bin/创建可执行文件链接 - 会在
/usr/local/nodejs/share/的man/(给man用的)与doc/(给人看的)里,添加文档文件。
# 调整所有组与权限
$ l
CHANGELOG.md  LICENSE  README.md  bin/  include/  lib/  share/

$ sudo chgrp -R webFile bin/ lib/node_modules/ share/man/ share/doc/
$ sudo chgrp root bin/node
$ sudo chmod g+w bin/
$ sudo chmod -R g+w lib/node_modules/ share/man/ share/doc/
$ sudo chmod g+s lib/node_modules/ share/man/ share/doc/
VPS 隔离用户
不需要有sudo权限,普通用户就行。
$ sudo useradd -m claw && sudo passwd claw
$ sudo gpasswd -a claw webFile
$ sudo chsh -s /bin/bash claw # 默认是 /bin/sh,不会加载 /etc/bash.bashrc
$ su - claw

$ chmod u=rwx,g=,o= .ssh/
$ chmod u=rw,g=,o= .ssh/authorized_keys
OpenClaw 安装与初始化配置
推荐的安装器:curl -fsSL https://openclaw.ai/install.sh | bash
pnpm 全局安装(手动)
普通用户不推荐使用
pnpm add -g openclaw@latest
pnpm approve-builds -g                # 批准 openclaw、node-llama-cpp、sharp 等
pnpm add -g openclaw@latest           # 重新运行以执行 postinstall 脚本
pnpm 需要显式批准带有构建脚本的包。在首次安装显示”Ignored build scripts”警告后,运行 pnpm approve-builds -g 并选择列出的包,然后重新运行安装以执行 postinstall 脚本。
npm全局安装(手动)
$ npm install -g openclaw@latest clawhub@latest
# 安装验证
$ openclaw --version && clawhub -V
OpenClaw 2026.7.1 (2d2ddc4)
0.23.1
install scripts 需要手工运行
added 347 packages in 25s

85 packages are looking for funding
  run `npm fund` for details
npm warn allow-scripts 4 packages have install scripts not yet covered by allowScripts:
npm warn allow-scripts   openclaw@2026.7.1 (preinstall: node scripts/preinstall-package-manager-warning.mjs; postinstall: node scripts/postinstall-bundled-plugins.mjs)
npm warn allow-scripts   @google/genai@2.10.0 (preinstall: echo 'preinstall: no-op')
npm warn allow-scripts   protobufjs@7.6.3 (postinstall: node scripts/postinstall)
npm warn allow-scripts   tree-sitter-bash@0.25.1 (install: node-gyp-build)
npm warn allow-scripts
npm warn allow-scripts Run `npm approve-scripts --allow-scripts-pending` to review, or `npm approve-scripts <pkg>` to allow.

# install scripts
$ cd /usr/local/nodejs/lib/node_modules/openclaw
$ node scripts/preinstall-package-manager-warning.mjs
$ node scripts/postinstall-bundled-plugins.mjs
$ cd /usr/local/nodejs/lib/node_modules/openclaw/node_modules/protobufjs
$ node scripts/postinstall
$ cd /usr/local/nodejs/lib/node_modules/openclaw/node_modules/tree-sitter-bash
$ npx node-gyp-build # node-gyp-build 是在 ../ 目录下,所以使用 npx 自动搜索执行
配置clawhub
先到 clawhub.ai 注册账号,不登录使用clawhub,容易报错failed (429): Rate limit exceeded
# web 登录验证,clawhub 要先有 github 账号
PS D:\Downloads> clawhub login
Opening browser: https://clawhub.ai/cli/auth?xxx
✔ OK. Logged in as @xxx.
# 确认结果
PS D:\Downloads> clawhub whoami
✔ xxx
PS D:\Downloads>
Linux
$ clawhub login --help
🦞 ClawHub CLI v0.23.1

Usage: clawhub login [options]

Log in with device flow or store a token

Options:
  --token <token>  API token
  --label <label>  Token label (default: "CLI device login")
  --no-browser     Do not open browser (device flow prints a verification URL)
  --device         Use device flow (default)
  -h, --help       Display help for command
初始化配置openClaw
可参考[[PC/OpenClaw/安装 OpenClaw:原生 Windows|在原生Windows 上安装 OpenClaw]],或者一路跳过,安装后再去配置。
# 会安装为用户级服务 openclaw-gateway.service,也会在 .bashrc 添加 openclaw 自动补全。
$ openclaw onboard --install-daemon

$ systemctl --user list-unit-files --type service
$ systemctl --user start|stop|restart|reload|enable|disable openclaw-gateway
~/.bashrc
# OpenClaw Completion / OpenClaw CLI 工具的自动补全配置
[ -f "~/.openclaw/completions/openclaw.bash" ] && source "~/.openclaw/completions/openclaw.bash"
# claw 用户从ssh中退出,openclaw-gateway 还在运行中,什么没有做就是400M的内存,2%的CPU
$ ps -Ao user,pid,ppid,%mem,rss,%cpu,cmd --sort=-rss|head -n 16
USER PID PPID %MEM RSS %CPU CMD
claw 20408 19248 21.1 405608 2.0 /usr/local/nodejs/bin/node /usr/local/nodejs/lib/node_modules/openclaw/dist/index.js gateway --port 18789进入终端的TUI
$ openclaw tui配置自动更新
Windows下是个渣,Linux下很稳定,也有可能是版本区别win 0314 vs linux 260701。
# 1. 将更新渠道锁定 stable
$ openclaw config set update.channel stable
# 2. 开启自动更新总开关
$ openclaw config set update.auto.enabled true
# 3. 调整stable延迟错峰参数(默认6小时延迟、12小时抖动),168是一周,抖动是在延迟的基础上叠加。
$ openclaw config set update.auto.stableDelayHours 96
$ openclaw config set update.auto.stableJitterHours 12

# 查看当前配置:改完配置,要重启才能生效。
$ openclaw update status --json
# 前提配置文件中有 update 节点,不然报错 Config path not found: update.
$ openclaw config get update
配置后内容效果
  "update": {
    "channel": "stable",
    "auto": {
      "enabled": true,
      "stableDelayHours": 168,
      "stableJitterHours": 24
    }
  },
卸载
推荐自动:openclaw uninstall,而手工:
# Linux 用户
systemctl --user stop openclaw-gateway.service
systemctl --user disable openclaw-gateway.service
#rm -f ~/.config/systemd/user/openclaw-gateway.service
#systemctl --user daemon-reload

# Windows
openclaw gateway stop

# 公共
openclaw gateway uninstall
rm -rf "${OPENCLAW_STATE_DIR:-$HOME/.openclaw}"
rm -rf ~/.openclaw/workspace
npm uninstall -g openclaw
发表回复
要发表评论,您必须先登录。